New Relic Integration
DBmarlin can send data to New Relic. This allows you to view database performance data from within a New Relic quickstart dashboard.
The New Relic integration requires v2.7 of DBmarlin.
Install DBmarlin
Before installing the integration between DBmarlin and New Relic it is necessary to install DBmarlin first. If you haven’t already installed DBmarlin follow the instructions at docs.dbmarlin.com.
Configure DBmarlin
The next step is to configure DBmarlin with your New Relic connection parameters. DBmarlin pushes data to New Relic and needs to know the connection details.
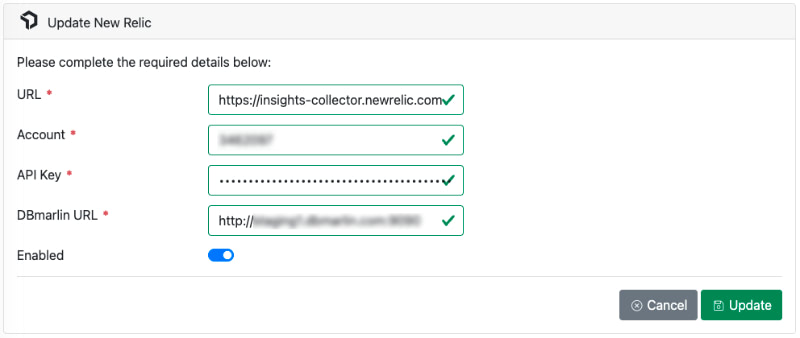
Using the UI
- In DBmarlin go to Settings -> Integrations and then click Edit to change the settings for the New Relic integration.
- Click Create to add a new New Relic endpoint
- Complete the URL, Account, API Key, DBmarlin URL and set to Enabled.
Using the API
These parameters may be entered using the following curl scripts on Linux. Use equivalent commands if you are on Windows. The commands assume you are on the the DBmarlin server. If you are running the commands remotely, substitute http://localhost:9080 for the hostname and port (typically 9090) of your DBmarlin installation. If you have enabled authentication in Nginx then you may also need to provide -u username:password to the curl commands. Don’t forget to substitute your values in the “value” fields.
- The
newrelic.urlparameter should either behttps://insights-collector.newrelic.comorhttps://insights-collector.eu01.nr-data.netif you are in Europe. - The
newrelic.accountis the account number for your New Relic account. - The
newrelic.apikeyis the API key from your New Relic account. - The
newrelic.dbmarlin.urlparameter links the DBmarlin quickstart dashboard back to the DBmarlin UI. It should include the protocol, for example, http://my-dbmarlin-host:9090.
curl -X POST 'http://localhost:9080/archiver/rest/v1/parameter' -H 'Content-Type: application/json' -d '[{"name":"newrelic.url","value":"<your-newrelic-url>"}]'
curl -X POST 'http://localhost:9080/archiver/rest/v1/parameter' -H 'Content-Type: application/json' -d '[{"name":"newrelic.account","value":"<your-newrelic-account-number>"}]'
curl -X POST 'http://localhost:9080/archiver/rest/v1/parameter' -H 'Content-Type: application/json' -d '[{"name":"newrelic.apikey","value":"<your-newrelic-apikey>"}]'
curl -X POST 'http://localhost:9080/archiver/rest/v1/parameter' -H 'Content-Type: application/json' -d '[{"name":"newrelic.dbmarlin.url","value":"<your-dbmarlin-url>"}]'
curl -X POST 'http://localhost:9080/archiver/rest/v1/parameter' -H 'Content-Type: application/json' -d '[{"name":"newrelic.enable","value":"true"}]'
Copy the New Relic WAR file
The final step of the DBmarlin configuration is to copy the New Relic WAR file from the extras directory under the DBmarlin installation into the tomcat/webapps directory.
cp extras/newrelic##2.1.war ./tomcat/webapps/
Tomcat should automatically expand the WAR file and, if the configuration parameter newrelic.enable has to been set to true, will start pushing DBmarlin data to New Relic. You can set newrelic.enable to false if you would like to stop sending data.
Using a Proxy server
If the DBmarlin server requires a proxy server to reach the New Relic API over the internet then you can define proxy host and port by adding the following java startup options to tomcat/bin/setenv.sh (or use DBmarlinTomcatw.exe on Windows).
CATALINA_OPTS=-Dhttp.proxyHost=... -Dhttp.proxyPort=... -Dhttp.nonProxyHosts=...
http.proxyHost: the host name of the proxy serverhttp.proxyPort: the port number, the default value being 80.http.nonProxyHostsa list of hosts that should be reached directly, bypassing the proxy. This is a list of patterns separated by '|'. The patterns may start or end with a '*' for wildcards. Any host matching one of these patterns will be reached through a direct connection instead of through a proxy.
Configure New Relic
To get the pre-built dashboard to visualize and monitor your data in New Relic:
- Start by visiting the DBmarlin quickstart for New Relic. Or, if you are already logged into the New Relic platform visit https://one.newrelic.com/marketplace and search for “DBmarlin”.
- Click install now. If you are already logged in, you will continue to the New Relic platform to confirm your quickstart installation. If you are not logged in or do not have an account, follow the instructions to sign up.
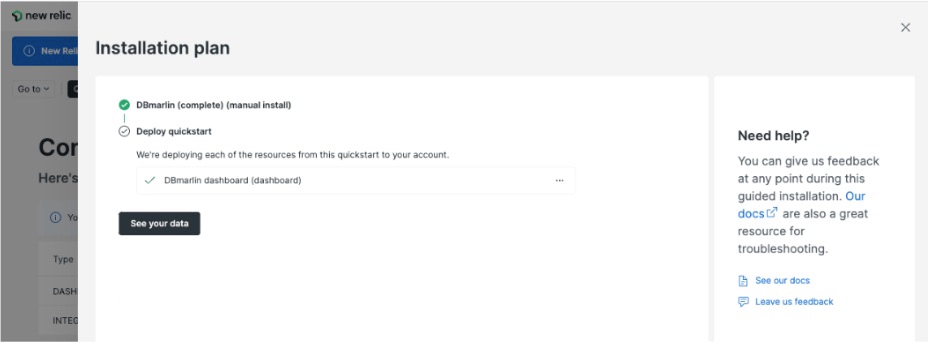
- Once you are on the confirmation page, select an account and select Begin installation.
- In the Installation plan page, select Done if you have already followed the steps in the Configure the integration in DBmarlin and Copy the New Relic WAR file sections above.
- Select See your data
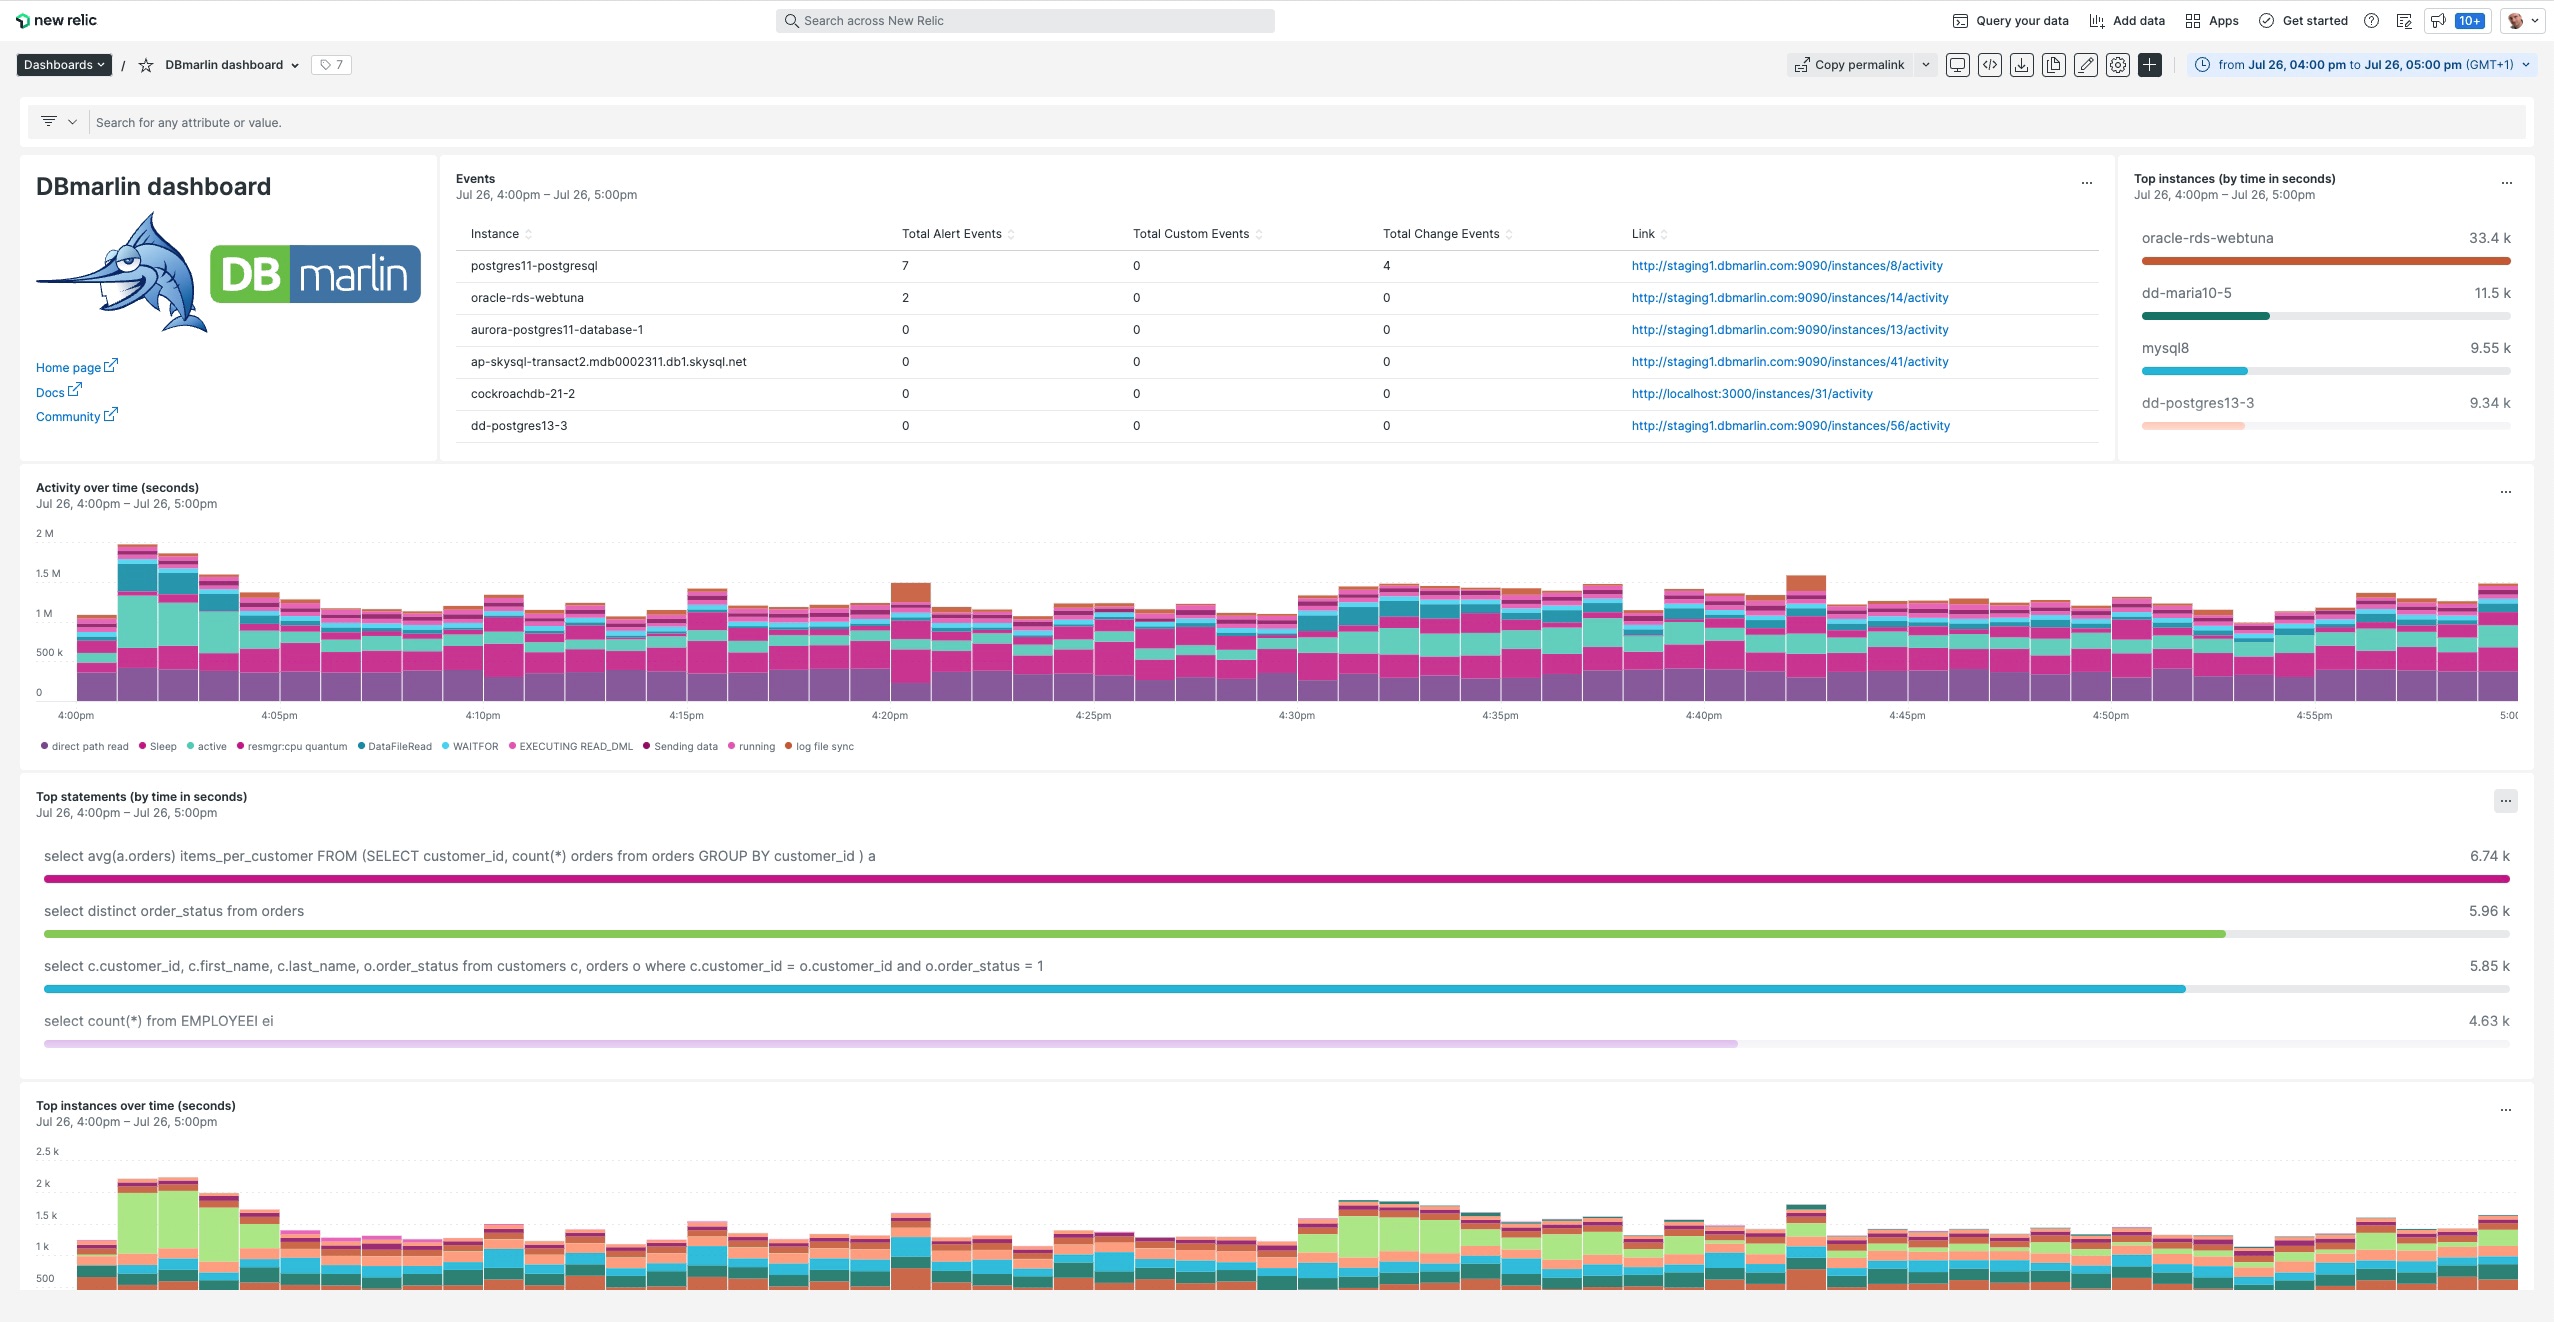
See data in New Relic
Once the steps above have been completed, you should see DBmarlin data in your New Relic dashboard like this.
Linking from New Relic to DBmarlin
To link back in the other direction, take a look at our browser extension